We had this for dinner last night and the kids requested the leftovers for lunch today because "It was so awesome yummy mom!" (-Dalton)
It's a recipe I received in a Smith's coupon/recipe booklet. I have been wanting to try it for sometime now. I love stuffed peppers but don't like making or baking them...they never really turn out. I really think it's going at the top of my favorite list:)
Unstuffed Pepper Bake -
1 lb. ground beef
1/3 cup onion - I used a sweet wala wala
1 1/2 cups diced peppers - use red, orange and yellow, 1/2 of each
1/2 tsp garlic powder
1/2 tsp salt
1/4 tsp pepper
1 (14.5 oz.) can Petite Diced Tomatos, drained
1 1/2 c. brown rice (white works too)
1 tsp Worcestershire sauce
1 tsp Italian seasoning
1 (8 oz.) pkg shredded sharp cheddar cheese, divided
1 (15 oz.) can tomato sauce
Preheat oven to 375*
Saute beef, onions, peppers and garlic powder until beef is browned and veggies tender. Drain off excess fat and season with salt and pepper
Stir in tomatos, rice, Worcestershire sauce and Italian seasoning. Remove from heat and add 1 c. of the shredded cheese.
Spread mixture into 13x9 pan and top with tomato sauce and remaining cheese.
Bake uncovered for 20 minutes, until heated through and cheese is melted and bubbly.
Let stand for at least 5-10 minutes before serving.
*Tip: I may cook rice before hand next time as our rice was still crunchy. The recipe never called for cooked rice though.*
Thursday, March 31, 2011
--unstuffed pepper bake--
Saturday, March 26, 2011
--Chocolate Andes Cookies--
I received Andes Mints from Doug for Valentine's Day and couldn't wait to make cookies out of them. When I realized I needed more than just one package I sent my husband to buy more. He came home with cherry and toffee ones - YUMMY!! These were such good cookies and pretty easy to make. I made a plate up to give as a thank you to a family in our ward - they were a hit!

- In a saucepan cook sugar, butter and water on medium heat stirring occasionally until melted. Remove from heat, stir in chocolate chips until melted and set aside to cool for 10 minutes.
- Pour the chocolate mixture into a large bowl, and beat in the eggs, one at a time. Combine the flour, baking soda and salt, stir into the chocolate mixture. Cover and refrigerate dough for at least 1 hour.
- Preheat oven to 350*. Grease cookie sheet. Roll cookie dough into walnut size balls and place 2 in. apart onto cookie sheets.
- Bake for 8-10 minutes, be careful not to over bake. When out of oven press mint into the tops of each warm cookie and let sit for 1 minute. When the mint is softened swirl with a knife or back of spoon.
Homemade Taco Seasoning
I love making Taco Soup for dinner. Especially on a cold day! Well a few weeks ago it was late and neither my husband or I felt like running to the store to buy taco seasoning so I googled how to make my own. I love this almost better than the package you buy in the store!!
Homemade Taco Seasoning --
2 tsp chili powder
1 1/2 tsp salt
1 tsp garlic powder
1 tsp corn starch
1 tsp cumin
1/2 - 1 tsp cayenne pepper (depending on how spicey you like it)
Mix together and add to you dish.
Enjoy!!
Saturday, January 22, 2011
○Wonderful Stuff○
When Doug and I were first married I tried this. I really didn't want to because I HATE coconut and nuts. But boy was I hooked!! It is so ooey-gooey melt in your mouth goodness. I guess that's why they call it WONDERFUL STUFF;) My mom makes this all year long for her Seminary students - it was a huge hit with her YW too at girls camp!! You can't go wrong wrapping this up and giving it away to neighbors and friends!!!!!
Wonderful Stuff -
1 box Rice Chex (we actually like Corn better)
(OR - the original recipe calls for 9 cups Chex and 8 cups Golden Grahmns)
1 cup coconut
1 cup slivered almonds
1 cup sugar
1 cup Karo syrup
3/4 cup butter
Stir together chex, coconut and almonds in a large bowl and set aside. Bring sugar, syrup and butter to boil in saucepan. Boil for 2 minutes without stirring. Take off heat and pour over cereal mixture. Stir until well coated. Store in air tight container. ENJOY - and TRY not to eat all in one sitting - LOL!!:)
Breakfast Casserole!!
I got this recipe from Doug's cousin Cherie. They have it for breakfast Christmas morning, it's been a tradition in their family for years. Her brother posted it on their blog Our Family Treat. I LOVE their blog and find lots of fun recipes there. This is their picture of the casserole. I ABSOLUTELY LOVED it!! We made the ham one for Christmas and the sausage one for New Years at my moms and they are soo good:) Thanks Cherie for sharing a fun tradition that I would like to make ours!!!!

12 slices of bread
{THE Perfect White & Chocolate Frostings}

Perfect Cupcake Frosting and Filling -3 T Flour1/2 C milk (whole milk is best, but I used non-fat when it's all I have and it's actually fine)1/2 C real butter1/2 C sugar (that's granulated sugar, not powdered sugar)1 t vanilla extract, or other flavor if you wish.
Whisk together the flour and the milk. Heat in a small sauce pan on medium he Whisk continuously until it starts to thicken. Let it cook, while stirring, until you can start to see the bottom of the pan. It should still be liquid-ish though, like this:
 It's okay if you have lumps, because we're gonna strain those out right now. Place the mixture in a mesh strainer and stir with a rubber spatula to push it through.
You should end up with a nice, smooth mixture. It's almost like pudding before it's set.

Put this mixture in the fridge and let it cool completely, it's fine if it stays in there long enough to get chilly, you just don't want it warm at all. When it is chilled, you can move on to the following step.
It an electric stand mixer, beat the butter and the sugar for a minute or two until well combined and fluffy. You'll want to use the whisk attachment on a stand mixer, not the flat paddle. Then while beating, add in the thickened milk mixture and the vanilla. Beat to combine and then scrape down the sides. Don't be scared. It's going to look like a goopy mess and kind of lumpy and separated like this:

But you just wait. It's gonna blow your mind in a few minutes. Beat on med-high for 7-8 minutes. Yes, that long. I know it seems like forever, but that's when the magic happens!
After 7-8 minutes it will have transformed from that sloppy mess into something gorgeous, fluffy, and incredibly light and silky.
 Use it to fill or frost cupcakes, cakes or other pastries. You can't go wrong putting this on just about anything :)
Frosts 12 cupcakes
Weight Watchers Points: 1 point per tablespoon of frosting
Here are some helpful Notes:
1. Use real butter, and a good name-brand. Cheap butter does weird things.
2. If you beat for the 6-8 minutes and the mixture still looks strange, beat longer and at a higher speed if you can. It should come together, but it takes a little patience!
3. Store at room temperature. Frosting may separate in the fridge, but you can store it overnight if left at room temp and in a well sealed container.
4. Add extracts to your hearts content; lemon is wonderful! Food coloring is also okay.
5. The white sugar can be exchanged for brown. Try 1/2 white 1/2 brown for a warm caramel flavor.
6. Do not try to make other substitutions or additions. Sour cream, cream cheese, fruit purees all do disastrous things.
Chocolate Frosting -

Chocolate Frosting
Recipe adapted by Our Best Bites from Sugar Plum
2/3 cup granulated sugar
1/3 cup all-purpose flour
3 tablespoons unsweetened cocoa powder
1 cup milk
1 cup real butter, softened
1 cup semi-sweet chocolate chips, melted
Optional: Additional cocoa powder as needed
Melt your chocolate chips if you haven't already and set aside to cool. You obviously don't want it so cool that it hardens, but you can get it close to room temperature and still have it be soft and stir-able.
In a small saucepan, whisk together sugar, flour, cocoa, and milk; bring to a boil, whisking frequently. Boil 1-3 minutes or until thickened like a thinned pudding. Remove pan from heat and strain mixture into a small bowl. Cool completely in the refrigerator or freezer.
When chocolate flour mixture is cooled, beat the butter until creamy, about 1 minute. Beat in the cooled chocolate mixture until well combined fluffy, about 1 minute. Finally add in melted chocolate and beat again until well combined and fluffy, about 2 minutes. If desired, add additional cocoa powder to taste, up to 4 tablespoons more. Spread or pipe frosting on to cupcakes or cake.
Makes enough to frost 24 cupcakes.
Storage: Store unused frosting in fridge and bring to room temperature before using again. If needed, beat with an electric beater before using.
Whisk together the flour and the milk. Heat in a small sauce pan on medium he
 Whisk continuously until it starts to thicken. Let it cook, while stirring, until you can start to see the bottom of the pan. It should still be liquid-ish though, like this:
 It's okay if you have lumps, because we're gonna strain those out right now. Place the mixture in a mesh strainer and stir with a rubber spatula to push it through.
You should end up with a nice, smooth mixture. It's almost like pudding before it's set.

Put this mixture in the fridge and let it cool completely, it's fine if it stays in there long enough to get chilly, you just don't want it warm at all. When it is chilled, you can move on to the following step.
It an electric stand mixer, beat the butter and the sugar for a minute or two until well combined and fluffy. You'll want to use the whisk attachment on a stand mixer, not the flat paddle. Then while beating, add in the thickened milk mixture and the vanilla. Beat to combine and then scrape down the sides. Don't be scared. It's going to look like a goopy mess and kind of lumpy and separated like this:

After 7-8 minutes it will have transformed from that sloppy mess into something gorgeous, fluffy, and incredibly light and silky.

Frosts 12 cupcakes
Weight Watchers Points: 1 point per tablespoon of frosting
Here are some helpful Notes:
1. Use real butter, and a good name-brand. Cheap butter does weird things.
2. If you beat for the 6-8 minutes and the mixture still looks strange, beat longer and at a higher speed if you can. It should come together, but it takes a little patience!
3. Store at room temperature. Frosting may separate in the fridge, but you can store it overnight if left at room temp and in a well sealed container.
4. Add extracts to your hearts content; lemon is wonderful! Food coloring is also okay.
5. The white sugar can be exchanged for brown. Try 1/2 white 1/2 brown for a warm caramel flavor.
6. Do not try to make other substitutions or additions. Sour cream, cream cheese, fruit purees all do disastrous things.
Chocolate Frosting -
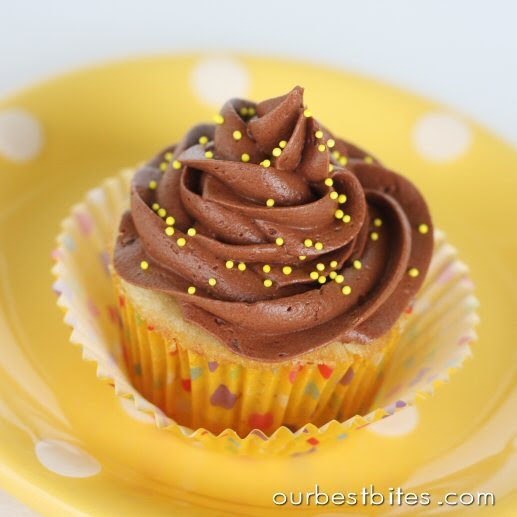
Recipe adapted by Our Best Bites from Sugar Plum
2/3 cup granulated sugar
1/3 cup all-purpose flour
3 tablespoons unsweetened cocoa powder
1 cup milk
1 cup real butter, softened
1 cup semi-sweet chocolate chips, melted
Optional: Additional cocoa powder as needed
Melt your chocolate chips if you haven't already and set aside to cool. You obviously don't want it so cool that it hardens, but you can get it close to room temperature and still have it be soft and stir-able.
In a small saucepan, whisk together sugar, flour, cocoa, and milk; bring to a boil, whisking frequently. Boil 1-3 minutes or until thickened like a thinned pudding. Remove pan from heat and strain mixture into a small bowl. Cool completely in the refrigerator or freezer.
When chocolate flour mixture is cooled, beat the butter until creamy, about 1 minute. Beat in the cooled chocolate mixture until well combined fluffy, about 1 minute. Finally add in melted chocolate and beat again until well combined and fluffy, about 2 minutes. If desired, add additional cocoa powder to taste, up to 4 tablespoons more. Spread or pipe frosting on to cupcakes or cake.
Makes enough to frost 24 cupcakes.
Storage: Store unused frosting in fridge and bring to room temperature before using again. If needed, beat with an electric beater before using.
Peppermint Fudge Cupcake Jars --

Peppermint Fudge Cupcake Jars -
Recipe by Our Best Bites
Makes approximately 8 jars or 12 Cupcakes
Cupcakes -
2/3 cup all-purpose flour
2 1/2 Tbs unsweetened cocoa powder
3/4 tsp baking powder
1/4 tsp salt
3 oz chocolate, chopped. Use bittersweet, dark, or semi-sweet.
1/2 C + 3 Tbs real butter, cut into pieces
3/4 C plus 2 Tbs sugar
3 large eggs, at room temperature
1 tsp vanilla extract
8 8oz wide mouth mason jars (the short squatty kind)
Preheat oven to 350 degrees. Place the chocolate and butter in a large heatproof bowl and microwave in 30 second intervals, stirring after each, until melted and smooth. Set mixture aside and let cool 10-15 minutes. In a separate bowl, whisk together the flour, cocoa powder, baking powder and salt. Using a wooden spoon (don't use an electric mixer) stir the sugar into the chocolate mixture until combined. Stir in the eggs one and a time, beating with your spoon until combined after each addition, and then beat in the vanilla. Gently fold in the flour mixture just until no traces of flour remain; do not overmix.
Place the mason jars on a cookie sheet. Divide the mixture evenly among the 8 jars (no need for greasing the jars) or 12 cupcake liners if you're going that route. The jars should be about half full or a little less. Bake until a toothpick inserted into the center of the jar comes out with only a few moist crumbs attached 22-25 minutes. Remove from oven and carefully (with a pot-holder!) transfer jars to a cooling rack. Let jars cool till at least close to room temperature before topping with ganache.
Peppermint Ganache -
4 oz semi-sweet chocolate chips
1/2 C heavy cream
1/4 tsp peppermint extract
Place chocolate chips in a bowl. Heat cream in microwave until bubbles form around the outside. Pour in bowl over chocolate chips and immediately cover bowl with plastic wrap. Let sit for 5 minutes, add peppermint extract and then whisk until smooth. Let cool un-covered until thickened slightly, almost like a thin pudding.
To assemble, pour 1 1/2-2 Tbs ganache over the top of each cupcake jar. If desired, use a paring knife to first hollow out a well in the middle of the cake. Tilt jars to distribute ganache evenly over the top of the cake and then let cool for the ganache to set. If storing overnight, place lids and rings on jars and leave at room temperature.
Frosting -
Use this frosting recipe (or see my post), adding peppermint extract (in addition to the vanilla extract called for) at the end by 1/4 tsp to taste. I prefer at least 1/2 tsp. See instructions in the above post for creating a red and white striped look. Pipe frosting on each jar, being careful to leave room for the lid. If desired, sprinkle on some crushed candycanes and then screw on jar lids.
Storage: Note that just because these are in jars does not mean they are shelf stable for extended periods of time. Also, baked goods are always best fresh, that being said, here are a few storage options.
When fully made, store with lids on at room temp for a day or two. If made up to the ganache step (before frosting) you can screw lids on and store in the fridge for 3-4 days, then frost right before gifting. If you'd like to fully prepare them a day or two ahead of time, I would actually reverse the filling and topping. Core out the center of the cupcakes and fill with frosting. Place the "cap" of the cupcake back over the hole and then top the entire top with ganache and a sprinkling of candycane. Store at room temp for 1-2 days or refrigerated for 3-4.
▬Candy Cane Cookies▬
I know Christmas is over and I am waaay behind on posting. But my folders are stuffed full of recipes so I figured I would get caught up and post some fun holidays treats so I don't loose them. Here is a very yummy cookie my friend Lori gave me that the kids and I made to go along with a book called "The Legend of the Candy Cane". Not all of ours turned out pretty and I need some practice but these are delicious:)

Candy Cane Cookies -
1 Cube butter (1/2 c.)
½ C shortening
1 egg
1 tsp vanilla
2 ½ C flour
1 C powdered sugar
1 ½ tsp almond extract
1 tsp salt
1 T crushed peppermint candy (reserved for after baking)
powdered sugar for dusting
Divide dough in half. Use ½ tsp food coloring in half. Make a big white rope
and red rope and twist together and cut into individual portions and form in the
shape of candy cane.
Bake at 350 for about 12 minutes or until lightly browned around edges.
When out of the oven, sprinkle with powdered sugar and crushed peppermint
candies. ENJOY!!
Tuesday, December 21, 2010
{Crockpot Chicken Nachos}
My friend Sara gave this to me and my family REALLY likes it. Your house smells so yummy while it's baking too:)
Crockpot Chicken Nachos -
2-3 large chicken breasts
1 sm bag of frozen corn or canned corn drained
1 can black beans - rinsed
1 16 oz. mild salsa
8 oz. cream cheese
Put chicken in crockpot and add corn, black beans and then pour salsa over top. Cook on low for 4 hours. Pull apart chicken with fork then add cream cheese and cook for another half & hour on low. Mix together and serve on chips, sprinkled with cheese. Enjoy!!
(Note: she suggested you add cream cheese 2 hrs. before serving rather then hour before)
~Sugar & Honey Glaze~
I searched the internet and found this delicious glaze for ham. My mom usually buys one already glazed but didn't for Thanksgiving so we tried this one - we LOVED it!! We found it over at cooks.com.
Sugar & Honey Glaze -
1 c. packe brown sugar
1/2 c. honey
1/4 c. drippings from ham
1 Tbl. grated orange peel
Bake ham according to directions. About 45 min. before it's done pour glaze over top, making sure to get down inside the meat.
We actually put an already baked Ham in a crockpot and poured the glaze over top. We let it cook on low all day. It was so juicy and I liked the zest from the orange. Enjoy!!
•Cranberry-Orange Jello Salad•
Gosh it's been forever since I have posted - sorry!!
The holidays crept up and I have been sooo busy. But I wanted to post some holiday recipes for you all. This one we had at Thanksgiving and just recently at a family party - it was a hit. It's a dish we serve at EVERY get together with my family because it's my dads favorite. Yet we didn't make it with blueberry pie filling like your suppose to. Me and my mom wanted to make it festive and add cranberry and orange. We LOVE it!!!!
Cranberry-Orange Jello Salad -
2 c. boiling water
1 lg pkg red Jello - we prefer Raspberry
1 lg can crushed pineapple (use juice)
1 can whole berry cranberry sauce
1/2 c. orange juice
1/2 c. 7-Up
1 orange - for zesting
Dissolve Jello in boiling water then add remaining ingredients. Zest about 1 Tbl. of the orange and stir all together. Place in 9x13 pan and refridgerate till jello sets up. Spread topping on top before serving. I grated more orange zest on top for color:) You can also top with chopped nuts.
Topping:
8 oz. cream cheese
8 oz. sour cream
1/2 c. sugar
Beat together till smooth.
If you prefer to make the blueberry version just add blueberry pie filling instead of cranberries. Omit the orange juice and use 1 c. 7Up instead and don't use orange zest. ENJOY!!
Wednesday, November 24, 2010
Baked Pumpkin French Toast
I think we are gonna have to have this for breakfast in the morning....mmmmmm!!!!
(thanks to dana-made-it.com)

Here you go!
Baked Pumpkin French Toast
1 loaf french bread
2 1/2 cups lowfat milk
1 Tbl flour
1 1/2 tsp vanilla extract
1 Tbl sugar
3/4 cup pumpkin puree (canned or fresh)
1/4 tsp cinnamon
1/4 tsp cloves
1/4 tsp salt
2 large eggs
1 cup packed light brown sugar
1/2 cup light-colored corn syrup
1/4 cup butter (half a stick)
2 Tbl sugar
1 tsp Cinnamon
Cut the bread loaf into thick slices.
Combine and whisk the next set of ingredients from the milk down to the eggs.
In a saucepan, combine the butter, corn syrup, and brown sugar. Cook over medium heat, stirring constantly till bubbly (about 5 minutes)
Grease a 9x13 pan (I chose an oval dish) and you're ready to combine all the ingredients.
Pour the caramel mixture in the bottom of the pan:
Place the bread slices, in a single layer over the caramel syrup. Squish them in; it's okay to crowd.
Pour the milk/egg/pumpkin mixture over the top.
It may seem like a lot of liquid but most of it will soak up over night. And don't worry about splotches of pumpkin that settle as well. It will all be yummy goodness when you're done.
Place plastic wrap over the top and refrigerate for 8 hours or overnight.
When ready to bake, preheat the oven to 350 degrees. Remove plastic wrap and sprinkle Cinnamon/Sugar mixture over the top (2 Tbl sugar, 1 tsp cinnamon).
Bake for 50 minutes and let it stand for 5 minutes before serving. It will be big a puffy at first and slowly settle down.
Pour syrup over the top and serve!
And no surprise....but it tastes even better with cool whip too. YUM. My favorite pumpkin recipe to date? I think so!
Wednesday, November 3, 2010
{Cinnamon Toasted Pumpkin Seeds}

Cinnamon Toasted Pumpkin Seeds -
1 cup raw pumpkin seeds
1 Tblsp. butter, melted
2 tsp. granulated sugar
1/2 tsp. ground cinnamon
kosher salt
1. Preheat oven to 275 F
2. Wash pumpkin seeds by rinsing in a colander until the water runs clear, picking out any remaining pieces of pumpkin. Drain well and spread out on a cookie sheet and pat dry with a paper towel.
3. Pile pumpkin seeds on the cookie sheet and drizzle melted butter over the pile of seeds and sprinkle on the sugar, cinnamon and a pinch or two of kosher salt.
4. Gently toss seeds until evenly coated and spread the seeds out evenly on the cookie sheet.
5. Bake in 275 F oven for approximately 30 minutes or until lightly toasted, stirring seeds every 10 minutes and checking for doneness each time.
6. Remove from oven and let the seeds cool for a few minutes.
7. Remove seeds from cookie sheet and serve!
Chances are there won't be any leftovers, but if there are, store seeds in an airtight container for a few days to preserve freshness.
Enjoy! :)
-Pepperoni Poppers-

1 can thin crust pizza dough
4-5 pieces of string cheese
pepperoni or ham (my favorite)
ranch or marinara for dipping
Directions:
Separate the pizza dough into 15-20 small balls, around golf ball sized or a little smaller.
Cut the string cheese into 4-5 pieces and stuff into the center of each dough ball. Seal the cheese inside the ball.
Lay on greased baking sheet and press down slightly.
Place a pepperoni on top of each ball. And an added olive for an eerie look - hehehe!!
Bake at 425 for 15-20 minutes until golden brown and cooked through
Dinner in a PUMPKIN
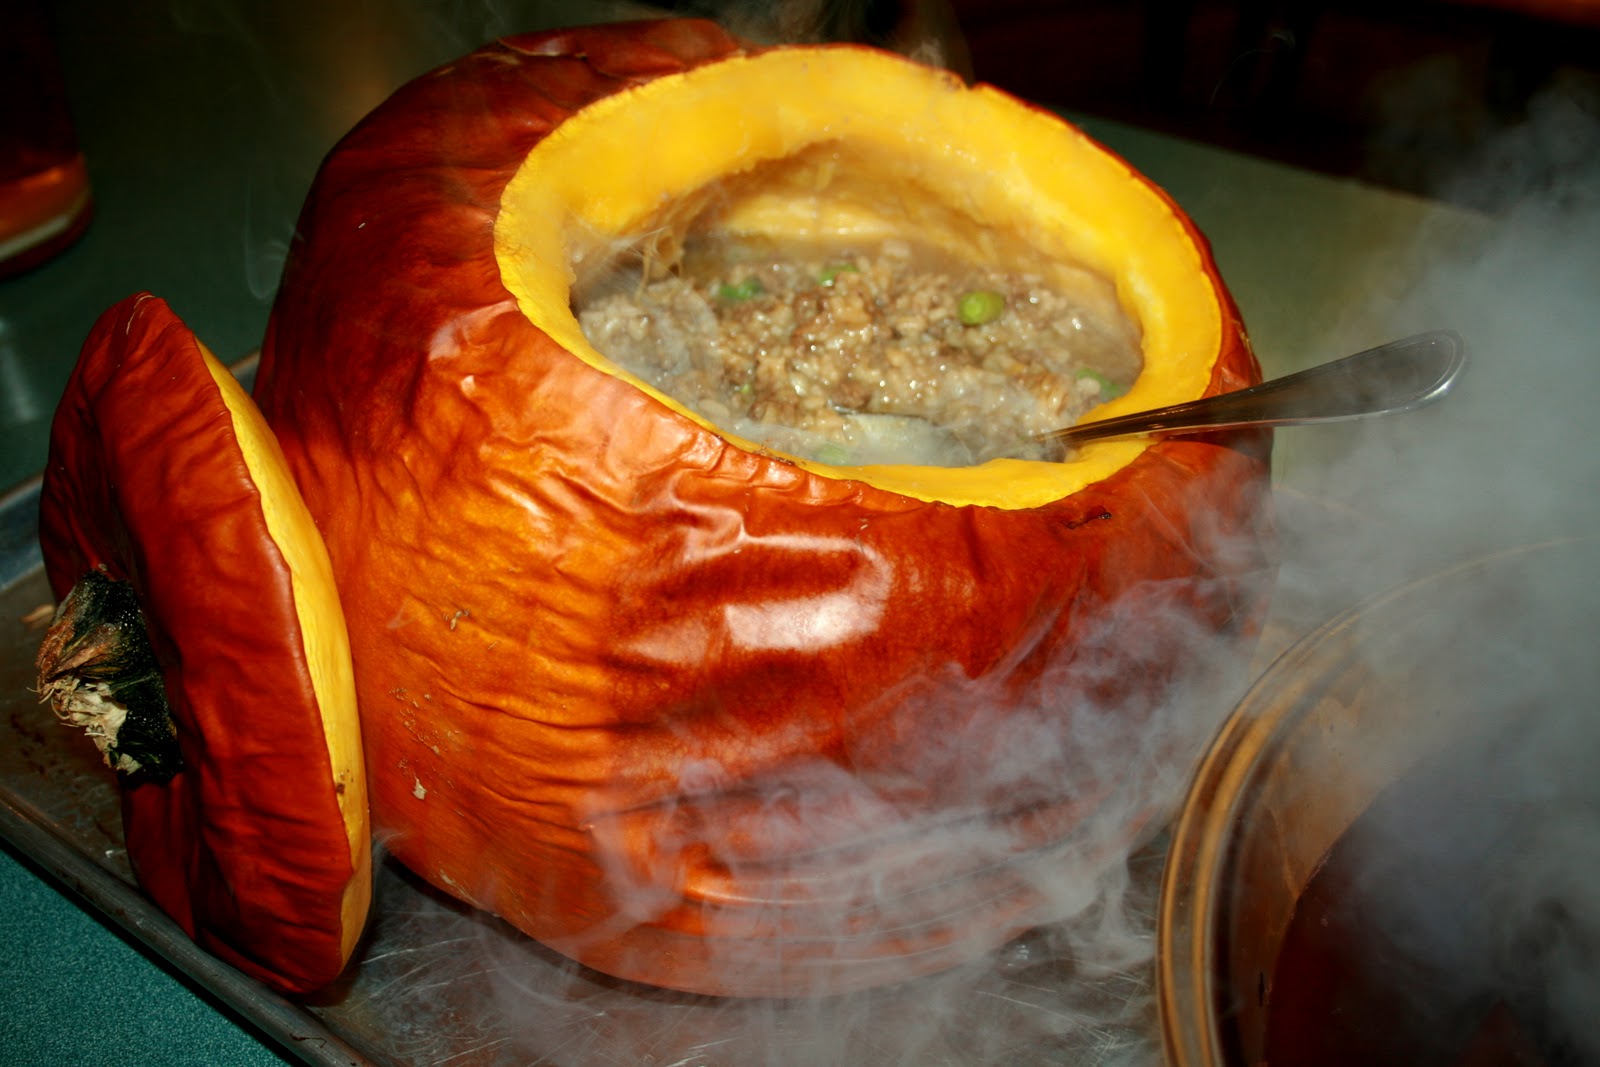
Ingredients:
1 medium pumpkin, remove top and clean insides out
1 1/2- 2 lbs of ground beef 1 cup chopped celery
1 onion, chopped
1/4 cup green onion, chopped
3 c. cooked rice
1 can cream of chicken soup
1 can cream of mushroom soup1/2 cup chopped or sliced mushrooms (omit if you aren't a mushroom fan)
3 tablespoons brown sugar
4 tablespoons soy sauce
salt and pepper
Brown hamburger. In another pot, cook rice (white or brown) as directed on package. Chop and saute celery, onion, and green onion. Once tender combine vegetables with hamburger, cream of chicken, cream of mushroom, mushrooms, brown sugar, soy and salt and pepper. Mix well.
Put mixture inside the pumpkin, replace lid. Place on baking sheet and into a 400 degree oven. Bake until pumpkin is tender (1 1/2 to 2 hours). Scoop out to serve, scraping sides of pumpkin to get the cooked pumpkin in the mixture. It is so good it melts in your mouth!
Monday, October 25, 2010
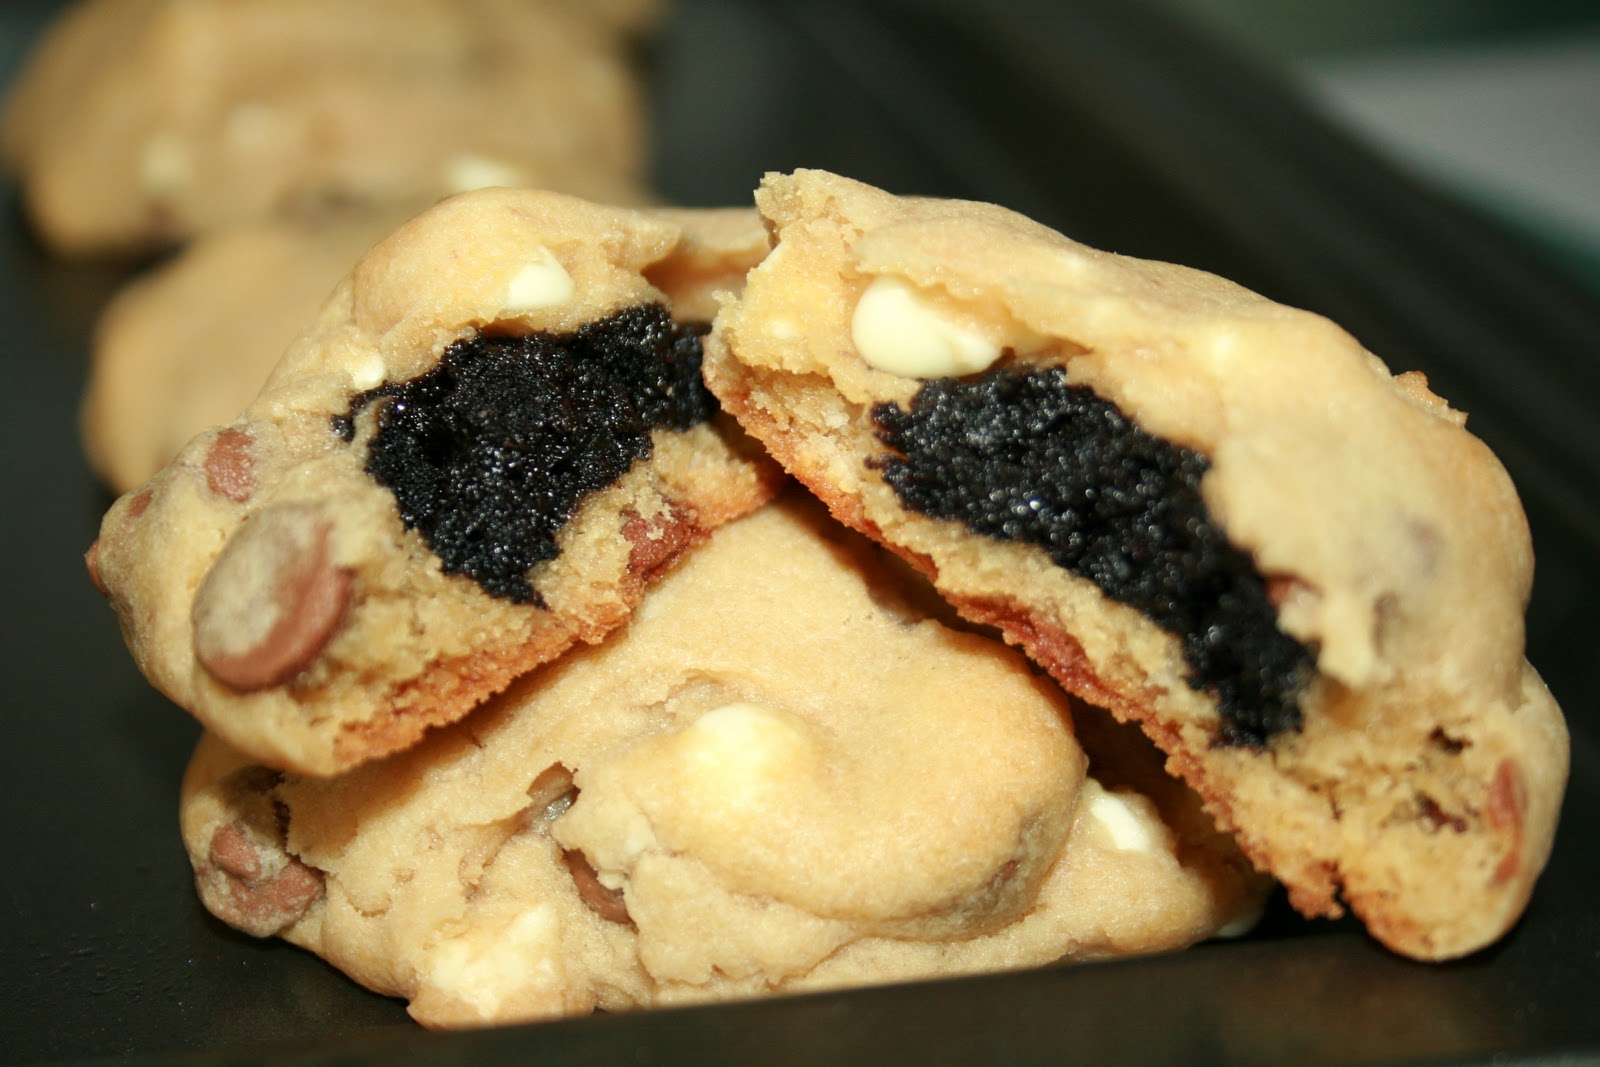
•Oreo Truffle Surprise Cookies•

1/2 teaspoon kosher salt
1 teaspoon baking soda
2 Cups chocolate chips
21 Oreos
2. Place flour, salt and baking soda into a large bowl; mix. Add to wet ingredients along with chocolate chips. Mix until just combined.
Tuesday, October 12, 2010
The Best Pumpkin Chocolate Chip Cookies Ever!!

1 c. granulated sugar
Beat these three together.
Add one egg
2 c. flour
2 tsp. baking powder
1. tsp. cinnamon
1/2 tsp. salt
sift these four together
Beat sugar, pumpkin, and oil with electric mixer. Add egg, beat.
Stir with baking soda/milk mixture. Add vanilla extract and chocolate chips. Stir (not mix).
Drop by tsp. onto ungreased cookie sheet. Bake 350 degrees F for 8-10 minutes.
Yields 3 1/2 dozen.

Monday, October 11, 2010
○YuMmY Caramel Apples○


32 caramels unwrapped
5 Tbl. evaporated milk
Melt caramels and milk in saucepan on low. Cool slightly and dip apples.
Easy Caramel --
1 lb. butter
2 cups sugar
1 tsp. vanilla
1/2 tsp. salt
Cook on medium heat stirring continually, to the hard ball stage with your candy therm. (about 4-5 min). Cool slightly and dip apples.
Creamy Caramel --
1 cup butter
2 cups sugar (white)
1 cup Karo syrup
1 can sweetened condensed milk
Cook first 3 ing. over medium heat to softball stage stirring constantly. Then add can milk and cook to hard ball stage. Pour into buttered dish and cool until ready to use. Do Not put in fridge.
TIPS that I learned --
Place wax paper on cookie sheet, wash & dry Granny Smith apples, and put sticks in them. Roll apples in caramel, wipe bottom quarter and excess with a butter knife, set on cookie sheet. Repeat. Once cookie sheet is full, put in fridge to cool completely before dipping in chocolate/decorating them. Or you can even make them the night before. Roll them in chocolate that is not too hot, then sprinkle immediately in desired toppings. Set back on wax paper and refridgerate. After cooled cut into wedges from the stem (like a pie) and ENJOY!!
AND here is a recipe I found today...
Honey Caramel Apples --
Recipe by Our Best Bites, inspired by Everyday Magazine
4 large (or 6 small) crisp apples, chilled in the fridge for at least 1 hour
1 Cup honey
1 Cup heavy cream
1 pinch salt (about 1/4 teaspoon)
1/2 tsp vanilla extract
In a heavy sauce pan over medium heat, combine cream, honey, and salt. Once warmed and whisked together, bring to a rolling boil. Reduce heat to a simmer (it should still be bubbling, but not so hot that is splatters all over). Stir and scrape sides of pot down occasionally until a candy thermometer (you should all have one by now--they cost about 3 bucks!) reaches 260 degrees.
To reach 260 degrees can take about 30 minutes, so while your caramel is cooking prepare your apples. Wash and dry them and skewer them with a popsicle stick or bamboo skewer. Place in the fridge to continue chilling until ready to use. Also line a baking sheet or cutting board with waxed paper or parchment paper and set aside.
When caramel has reached 260 degrees, remove from heat and let sit for 5 minutes, stirring occasionally. It should start thickening. You'll have to eyeball the consistency for dipping. If you'd like to help it along you can place your pot in a bowl of ice. And if it gets too hard to coat the apples, just return it to the heat until it's thin again.
Remove apples from fridge and dry them thoroughly with a towel. Dip in caramel, rolling and twirling each one so it gets well coated. Let excess drip off and then place on prepared sheet. Refrigerate for 10-20 minutes to set the caramel and then enjoy!
Sunday, October 3, 2010
Honeyed Banana Berry Cake Cookies
I found this recipe over at Picky Palate and after heading to Costco to get the blueberries we finally made them this week:) DO NOT forget to grease your pan or use parchment paper while baking these...mine stuck to my very non-stick pan horribly. BUT they were yummy and Dalt thought they tasted like pancakes so next time we will have them for breakfast:)
Berry Good Cookies:
1 box yellow cake mix
4 large banana's mashed
3/4 c. dried blueberries
4 TBL creamed honey or 2 TBL regular honey
Mix all ingredients. Drop by spoon full onto cookie sheet. Bake at 350* for 11-15 minutes.
ENJOY!!
•Chocolate Chip Cookie Bars•
School started and I feel like our lives have been crazy. Plus I have made Cake Pops/Bites for the past three weeks so I haven't done anything very creative in the cooking/baking department:) But I have this amazing neighbor that loves to spoil us with all of her yummy goodies every once and a while and last week she brought us these. I called her up to get the recipe and she told me it was off of a can of Crisco or off the package of chocolate chips - funny huh!! Because they were SO good:) Also her daughter didn't want to wait to keep baking the cookies so she made them into bars. Wow I don't know if I will make "cookies" again, this was so easy!!!!
Cookie Bars:
1 c. butter
3/4 c. brown sugar
1/2 c. sugar
1 egg
1/2 tsp. salt
1 tsp baking soda
2 1/4 c. flour
1 pkg chocolate chips
Cream sugars with butter, beat in egg, add dry ingredients and stir in chocolate chips. Press into greased baking sheet and bake at 375* for 10 minutes. Cool and cut into bars.
ENJOY!!
Thursday, September 9, 2010
Monkey Bread!

Wednesday, September 8, 2010
-- Give Me S'more Cupcakes --

Thursday, August 26, 2010
Yummy Salads --
My Aunt Linda gave my mom this really yummy and fun recipe book a few years back called "Favorites." It sat on my counter and I used it often. Well Linda recently moved back to Utah and had us all at her house for my sister's Baby Shower. At the shower, at my Baby L's Blessing and another time we went to her house she made some AMAZING chicken salads. The recipes came from a new cookbook from the same amazing women that made the first...it's called "Keeping Up Cookbook" and you can purchase it HERE!!

No Name DELICIOUS Salad:)
My aunt served up another FANTASTIC salad for us at my sister's baby shower and funny thing is I didn't get the name of it from her. So we will just call it an EASY DELICIOUS salad...
Head of Romain lettuce, washed and shredded
1-2 cans of black beans, rinsed and drained
Roasted corn = place frozen corn on cookie sheet, drizzle with olive oil and bake, turning occasionally till roasted.
Diced or shredded cooked chicken (She cooks hers in the oven)
1 sm. onion diced
Dressing = Equal parts buttermilk ranch dressing and Sweet Baby Ray's Barbeque sauce
Toss with salad and sprinkle with Tortilla Chip Strips!! This is such a refreshing, yummy salad!
ENJOY!!
Crock Pot Scalloped Potatoes & Chicken
Scalloped Chicken & Potatoes:
1 box scalloped potatoes (including seasoning packet)
6 chicken tenders
3 cups water
Put potatoes in greased slow cooker first, followed by seasoning packet and chicken. Pour water over all. Cover and cook on low heat 4-5 hours.
I found this somewhere out there on the internet...don't remember where but I have been dying to try it! My husband loves Scalloped Potatoes so it was a huge hit at the dinner table. I LOVED how it was fast, easy and yummy! Only thing I would do differently is to double it.
ENJOY!!
Tuesday, August 24, 2010
Chocolate Drop Cookies --
My Aunt Linda C. is an amazing cook!! I love sharing recipes back and forth:) She made these delicious cookies for my sister's Baby Shower and we gobbled them up so fast - lol!!
Chocolate Drop Cookies --
Cream together:
1/2 c butter
1c brown sugar
Add:
1 egg
1 tsp vanilla
And beat together
In small saucepan melt
2 1 oz. squares Bakers semi-sweet chocolate
Cool and add to above mixture.
Next alternate:
3/4 c sour cream
and dry ingredients that have been mixed together:
2 c flour
1/2 tsp soda
1/2 tsp salt
Drop onto baking sheet 2 in. apart using a small scoop. Bake at 350* for 10 minutes. Frost...
Frosting --
Mix together:
4 TBL cocoa
3 c powdered sugar
Than add:
4 TBL soft butter
2-3 TBL milk
1 tsp vanilla
Beat well. Add more milk or more powdered sugar to thicken or thin frosting
ENJOY!! These are very tasty and a great bit size cookie:)
Monday, August 16, 2010
☼When Life Gives You Lemons...☼


○Mini Cupcakes○


Monday, July 26, 2010
~Peanut Butter & Jelly Cuppycakes~

8 tablespoons unsalted butter, room temperature
1 cup granulated sugar
1 1/2 cups unbleached all-purpose flour
1 1/2 teaspoons baking powder
1/2 teaspoon table salt
1/2 cup sour cream
2 large eggs, room temperature
1 large egg yolk, room temperature
2 teaspoons vanilla extract
1 cup strawberry jelly ----> or really any favorite jelly!!
Peanut Butter Cream Cheese Frosting, recipe follows
Confetti pastel sprinkles, for garnish - I just used gold sugar that I found at Smith's
Directions::
Put an oven rack in the middle of the oven and preheat to 350 degrees F. Line a standard 12 cup muffin tin with cupcake liners.
In the bowl of a stand mixer, add the butter and sugar and beat until light and fluffy, about 3 to 4 minutes.
Meanwhile, in a medium bowl, whisk together the flour, baking powder, and salt.
Add the sour cream to the butter and sugar mixture and continue to beat until incorporated. Add the eggs and yolk, 1 at a time, beating until thoroughly mixed into the batter. Add in the vanilla and continue to mix. Slowly add the dry ingredients, in increments, and mix until combined.
Scoop the batter into the cupcake liners to fill 3/4 of the way. Put in the oven and bake until the cupcakes are a pale gold color and a cake tester comes out clean, about for 18 to 20 minutes. Remove the cupcakes from the oven and let cool in the tins for 5 minutes. Remove to a wire rack to cool completely before frosting and filling.
Meanwhile, fit a plain pastry tip to the bottom of a gallon-sized resealable plastic bag and fill with strawberry jelly. Once the cupcakes are cool, insert the tip far into the cupcake and slowly squeeze in about 1 tablespoon or so of jam. Be careful not to overfill the cupcakes or they will crumble and explode. Repeat with the remaining cupcakes. Frost the cupcakes with the Peanut Butter Cream Cheese Frosting using a pastry bag and a star tip. Sprinkle lightly with the confetti sprinkles, top with a little bit more jelly and serve.
Peanut Butter Cream Cheese Frosting:
1 (8-ounce) package cream cheese, room temperature
4 tablespoons unsalted butter, room temperature
1 teaspoon vanilla extract
1 cup creamy peanut butter
1 1/2 cups confectioners' sugar
In a large bowl, add the cream cheese and butter. Beat until well combined, then add the vanilla and peanut butter and beat until well mixed. Slowly add the confectioners' sugar and beat until well incorporated.
 |

Thursday, July 22, 2010
{Red Velvet CUPCAKES}